
Microsoft OneNote is great for taking, storing, and syncing notes among your devices. If you are conscious of security, then take a look at how to password protect your notes too. After all, Microsoft OneNote is meant to be the silo for all your information.
Microsoft currently offers two versions of OneNote in Windows: Microsoft OneNote for Windows 10 (the Microsoft Store app) and Microsoft OneNote 2016 (the Microsoft Office desktop app).
Microsoft is phasing out OneNote 2016 and porting features from the desktop app to the Microsoft Store app. But it’s still a work in progress and the desktop app is not going away yet.
You should consider switching to OneNote for Windows 10. But the desktop app still has features that aren’t yet included in the Microsoft Store app. One of those useful features is password protecting notebook sections and today we’ll cover how to do that.
A Few Notes on OneNote Section Passwords
You can only apply passwords to sections in notebooks, not to entire notebooks. And protected sections can be unlocked in OneNote for Windows 10, but you must use OneNote 2016 to apply a password to an unprotected section.
Microsoft OneNote uses encryption to secure password-protected sections. If you forget your password for a section, you will lose access to the notes in that section. Make sure you choose a strong password you won’t forget and remember that passwords in OneNote are case-sensitive.
Password-protected sections aren’t included in notebook searches. And tags on OneNote notes in a protected section aren’t included in note tag summaries when searching for tags. So before performing searches for text or tags, unlock the sections you want to include in your search.
Password Protect a Section in a OneNote Notebook
To password protect a section, open the notebook that contains the section you want to protect.
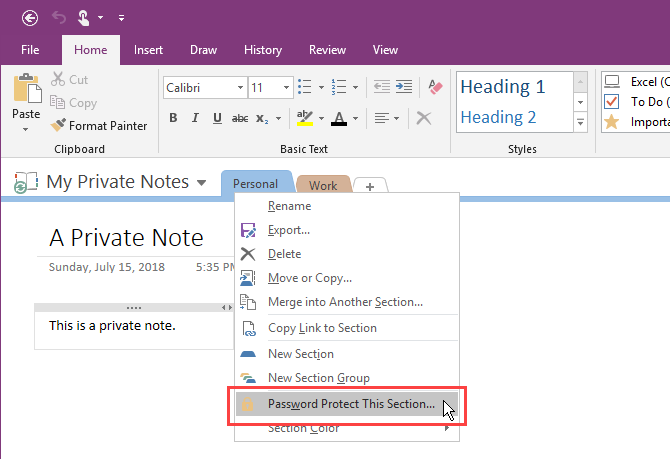
Then, right-click on the section tab and select Password Protect this Section. When you right-click on a section tab, that section automatically becomes the active section if it wasn’t.
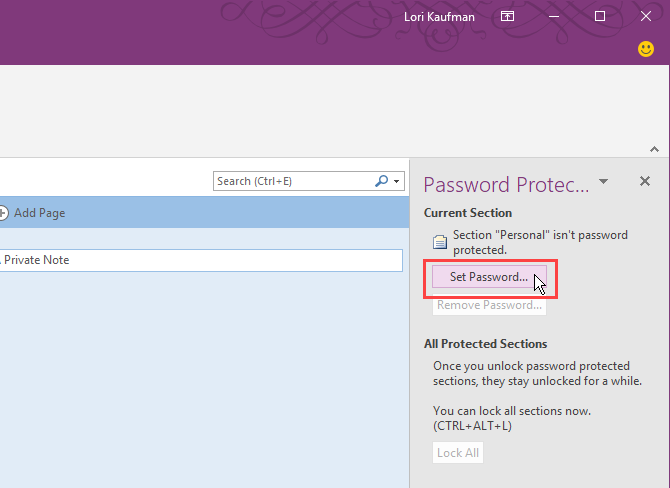
In the Password Protection pane on the right, click Set Password.
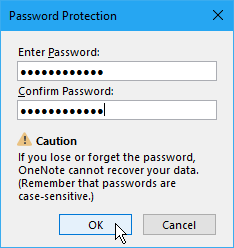
On the Password Protection dialog box, type the password you want into the Enter Password box and again in the Confirm Password box. Then, click OK.
Again, there is no way to recover a password for a protected section which means you’ll lose access to all the notes in that section. Make sure you create a strong password you can remember.
Lock Password-Protected Sections in OneNote
Applying a password to a section doesn’t immediately lock the section. By default, password protected sections are locked after five minutes. You can change this amount of time and we’ll show you how to do that later.
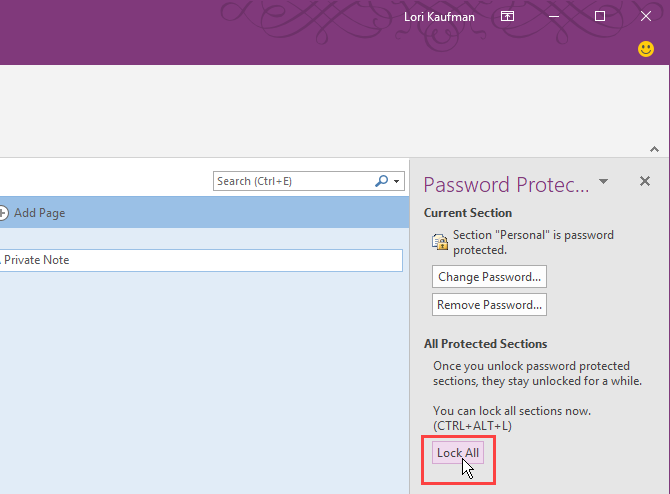
To lock a section you protected with a password, open the Password Protection pane for that section and click Lock All. This locks all password protected, currently unlocked, sections. You can’t lock just one section at a time.
Unlock a Protected Section in a OneNote Notebook
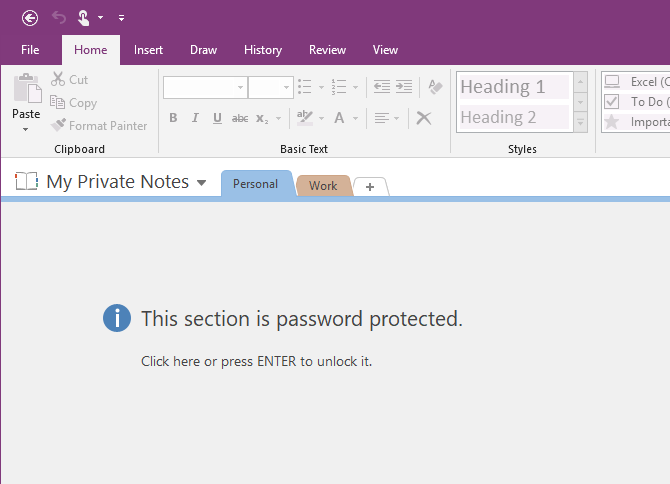
Locked sections display a message saying the section is password protected. To unlock the section, click on the section page or press Enter.
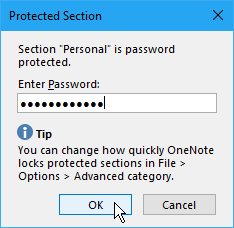
On the Protected Section dialog box, enter your password and click OK.
All the notes in the protected section become accessible.
Change a Protected Section’s Password in OneNote
To continue to keep your notes secure, you should change your password periodically.
To change the password on a section, the section must first be unlocked as we talked about in the “Unlock a Protected Section in a Notebook” section above.
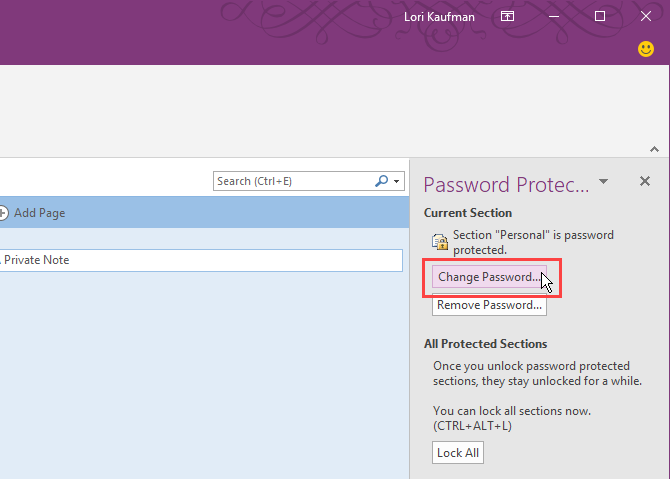
Then, open the Password Protection pane for that section and click Change Password.
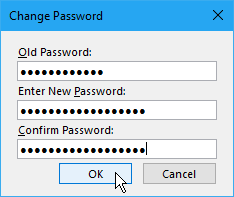
On the Change Password dialog box, type the current password into the Old Password box.
Then, type the new password in the Enter New Password box and again in the Confirm Password box. Click OK.
Change Options for Passwords in OneNote Sections
As we mentioned, unlocked password-protected sections will lock automatically after you haven’t worked in them for five minutes. You can customize the amount of time or disable the time limit.
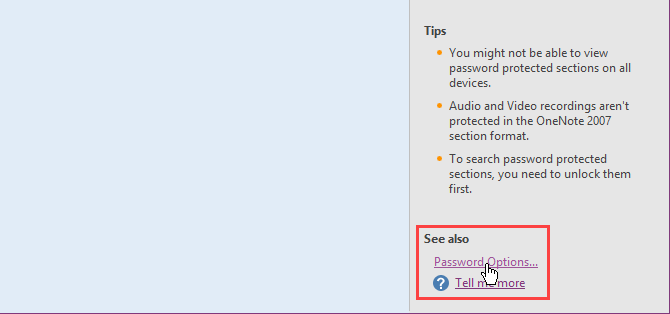
Open the Password Protection pane from any section tab. Then, click the Password Options link at the bottom of the pane.
You can also go to File > Options > Advanced to access the Passwords options.
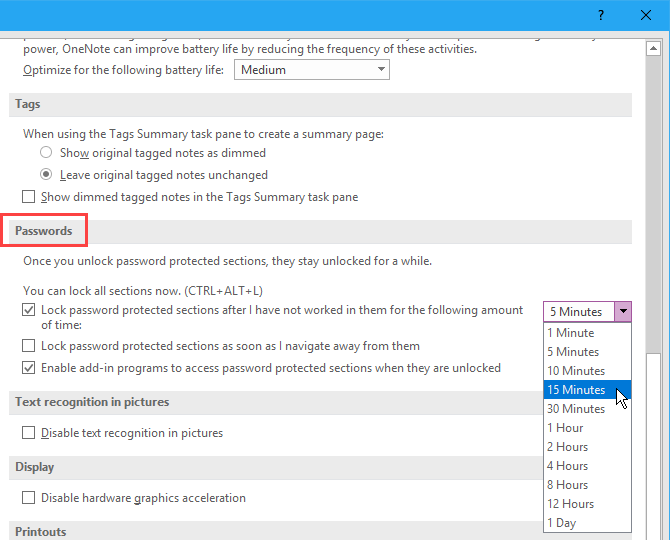
To change the amount of time when protected sections are automatically locked after inactivity, select a time range from the Lock password protected sections after I have not worked in them for the following amount of time dropdown list in the Passwords section on the right. You can prevent protected sections from automatically locking after a specific time period by unchecking the box.
To automatically lock protected sections when you go to another page, section, or notebook, check the Lock password protected sections as soon as I navigate away from them box.
To make notes in password-protected sections temporarily available to other programs, check the Enable add-on programs to access password-protected sections when they are unlocked box.
Then, click OK. You’ll see the following message after making any of these changes. Close OneNote and restart it to apply your changes.
Remove a Protected Section’s Password in OneNote
If you no longer need to protect a section, you can remove the password.
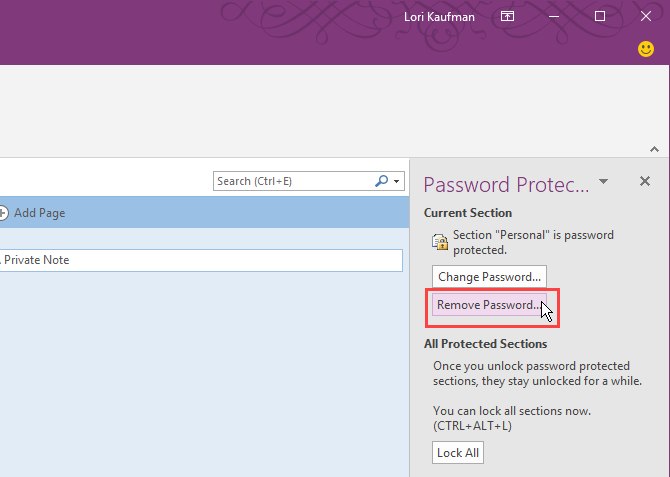
Open the section you want to unprotect and then open the Password Protection pane for that section.
Unlock the section, if needed. Then, click Remove Password.
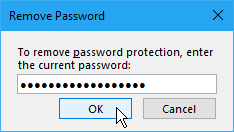
On the Remove Password dialog box, type the current password, and then click OK.
Access Protected Notes in OneNote on Mobile Devices
OneNote syncs all your notebooks, sections, and pages are to all your devices. And you can unlock and lock protected sections and access your private data on any device.
Troubleshooting: OneNote Needs a Password to Sync
If you get an error saying that OneNote needs a password to sync, the cached Microsoft Office credentials that store the password might be the cause. Deleting the cached credentials will most likely fix this error.
Close all Microsoft Office programs and follow these steps:
- Start typing “Credential Manager” in the Search/Cortana box on the taskbar.
- Click Credential Manager when you see it in the search results.
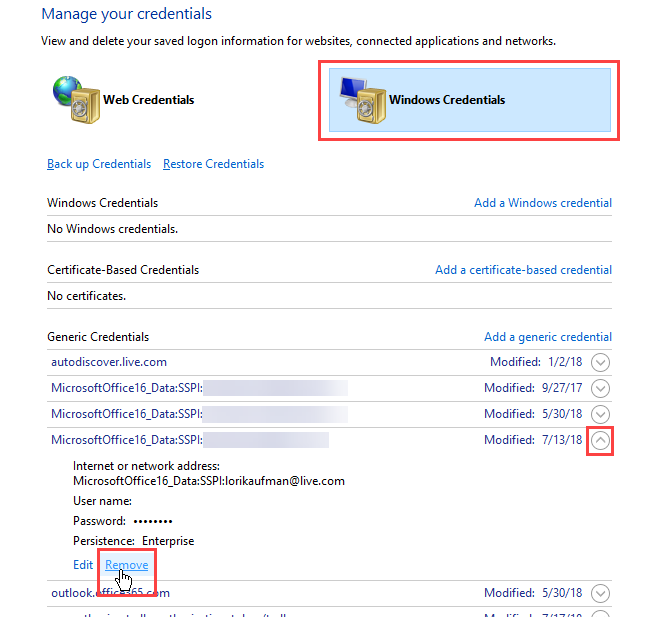
- Click Windows Credentials on the Manage your credentials screen.
- Under Generic Credentials, look for MicrosoftOffice16_Data:SSPI items. You’ll see one for each Microsoft account you’ve signed into on your computer. Expand the section by clicking the down arrow on the right for the account you want to clear.
- Click Remove.
- Click Yes on the confirmation dialog box that displays.
- Remove the other MicrosoftOffice16_Data:SSPI items to get a fresh start and make sure you can sync your notebooks.
- Close the Credential Manager and restart your computer.
- Launch OneNote and enter your credentials.
Protect Your OneNote Data With Passwords!
Part of protecting your data is backing it up. By default, OneNote stores your notebooks in your OneDrive account, so they sync with your other devices.
In OneNote 2016, you can choose to store notebooks on your local drive. This is one way to make it easy to back up your OneNote data. We’ve covered methods for syncing, backing up, and restoring OneNote notebooks, so be sure to incorporate those into your workflow as well.
Read the full article: How to Password Protect Your Notes in OneNote 2016
from MakeUseOf http://bit.ly/2LEn7A1

No comments:
Post a Comment